
Purling a stitch in the English style
Insert the tip of the right needle into the next stitch, from right to left. The right needle should cross in front of the left needle. The yarn is held in front of the work.
With your right hand, loop the yarn counter-clockwise around the front (right) needle. This loop will become the new knit stitch.
Drag the tip of the right needle back through the stitch on the left needle, pulling the looped yarn through.
Allowing the worked stitch to fall off the tip of the left needle. A new loop now sits on your right needle; this is a new purl stitch!
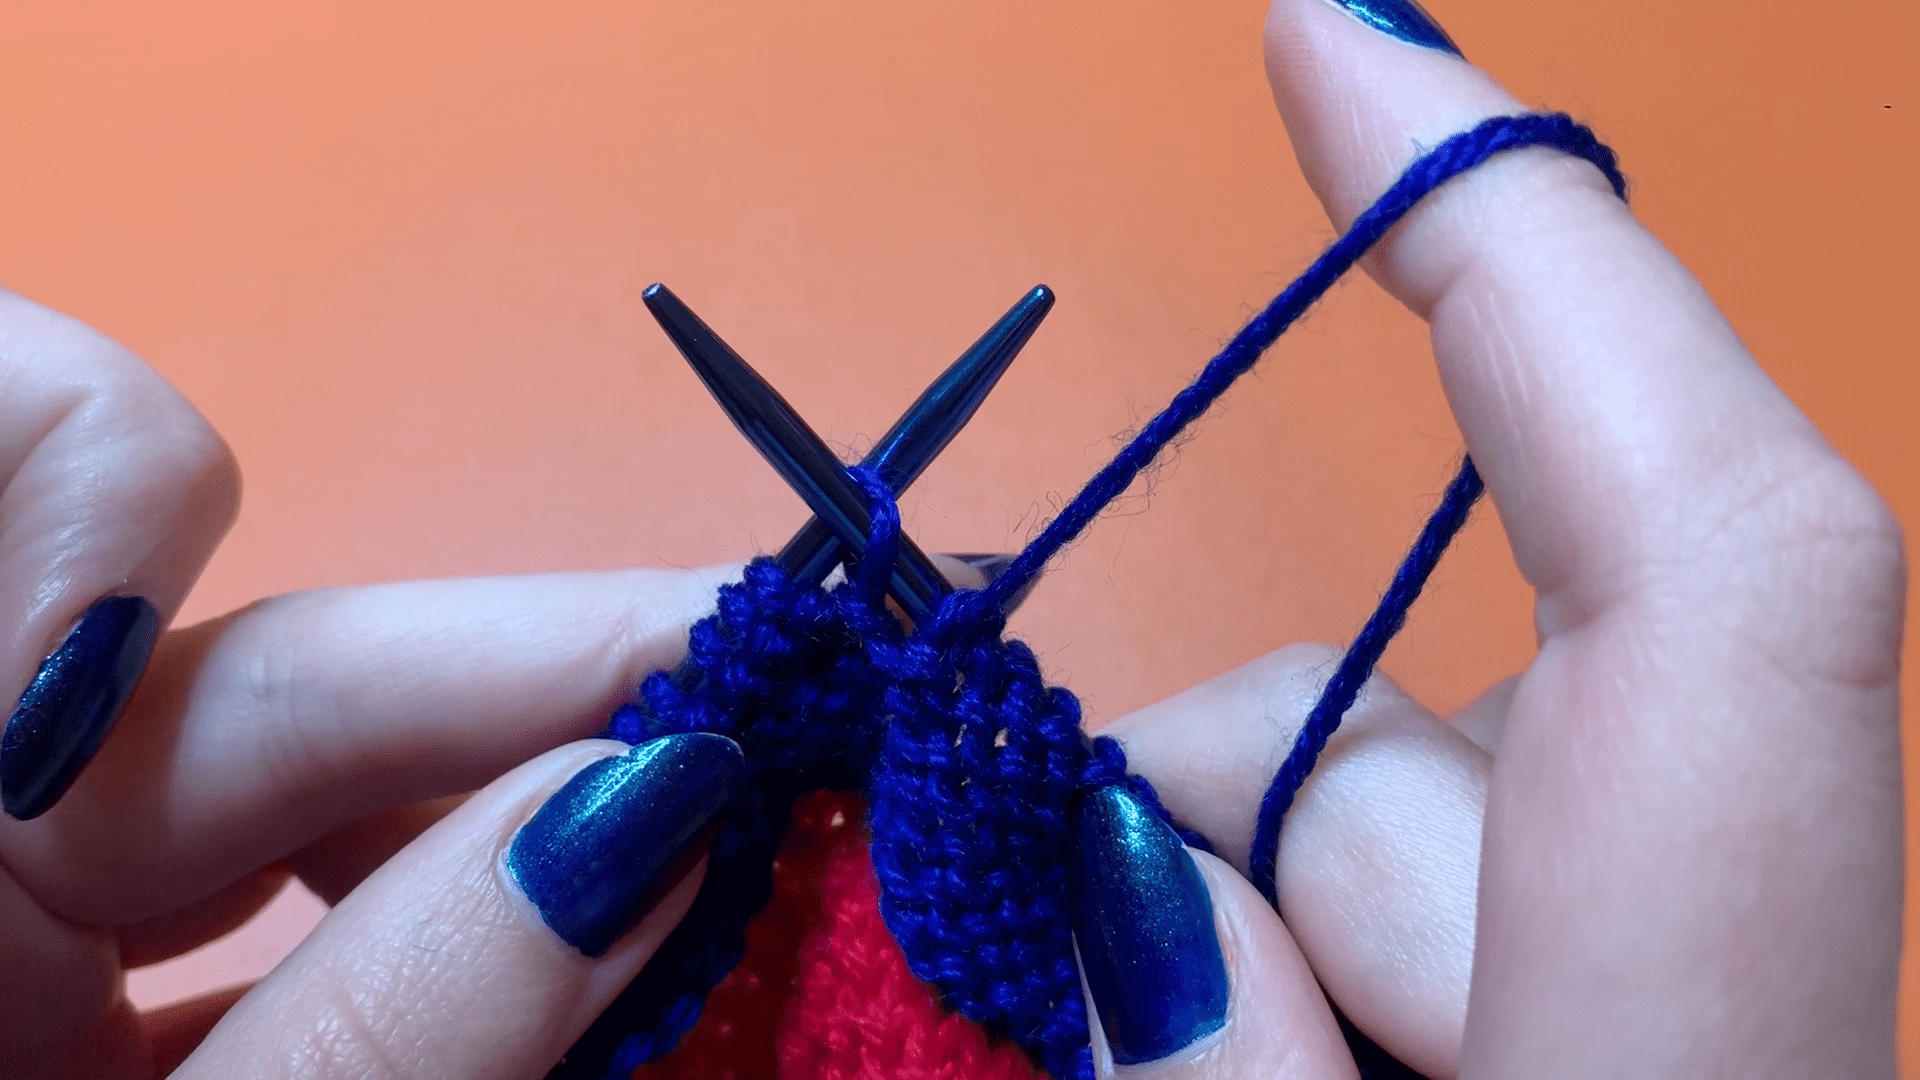
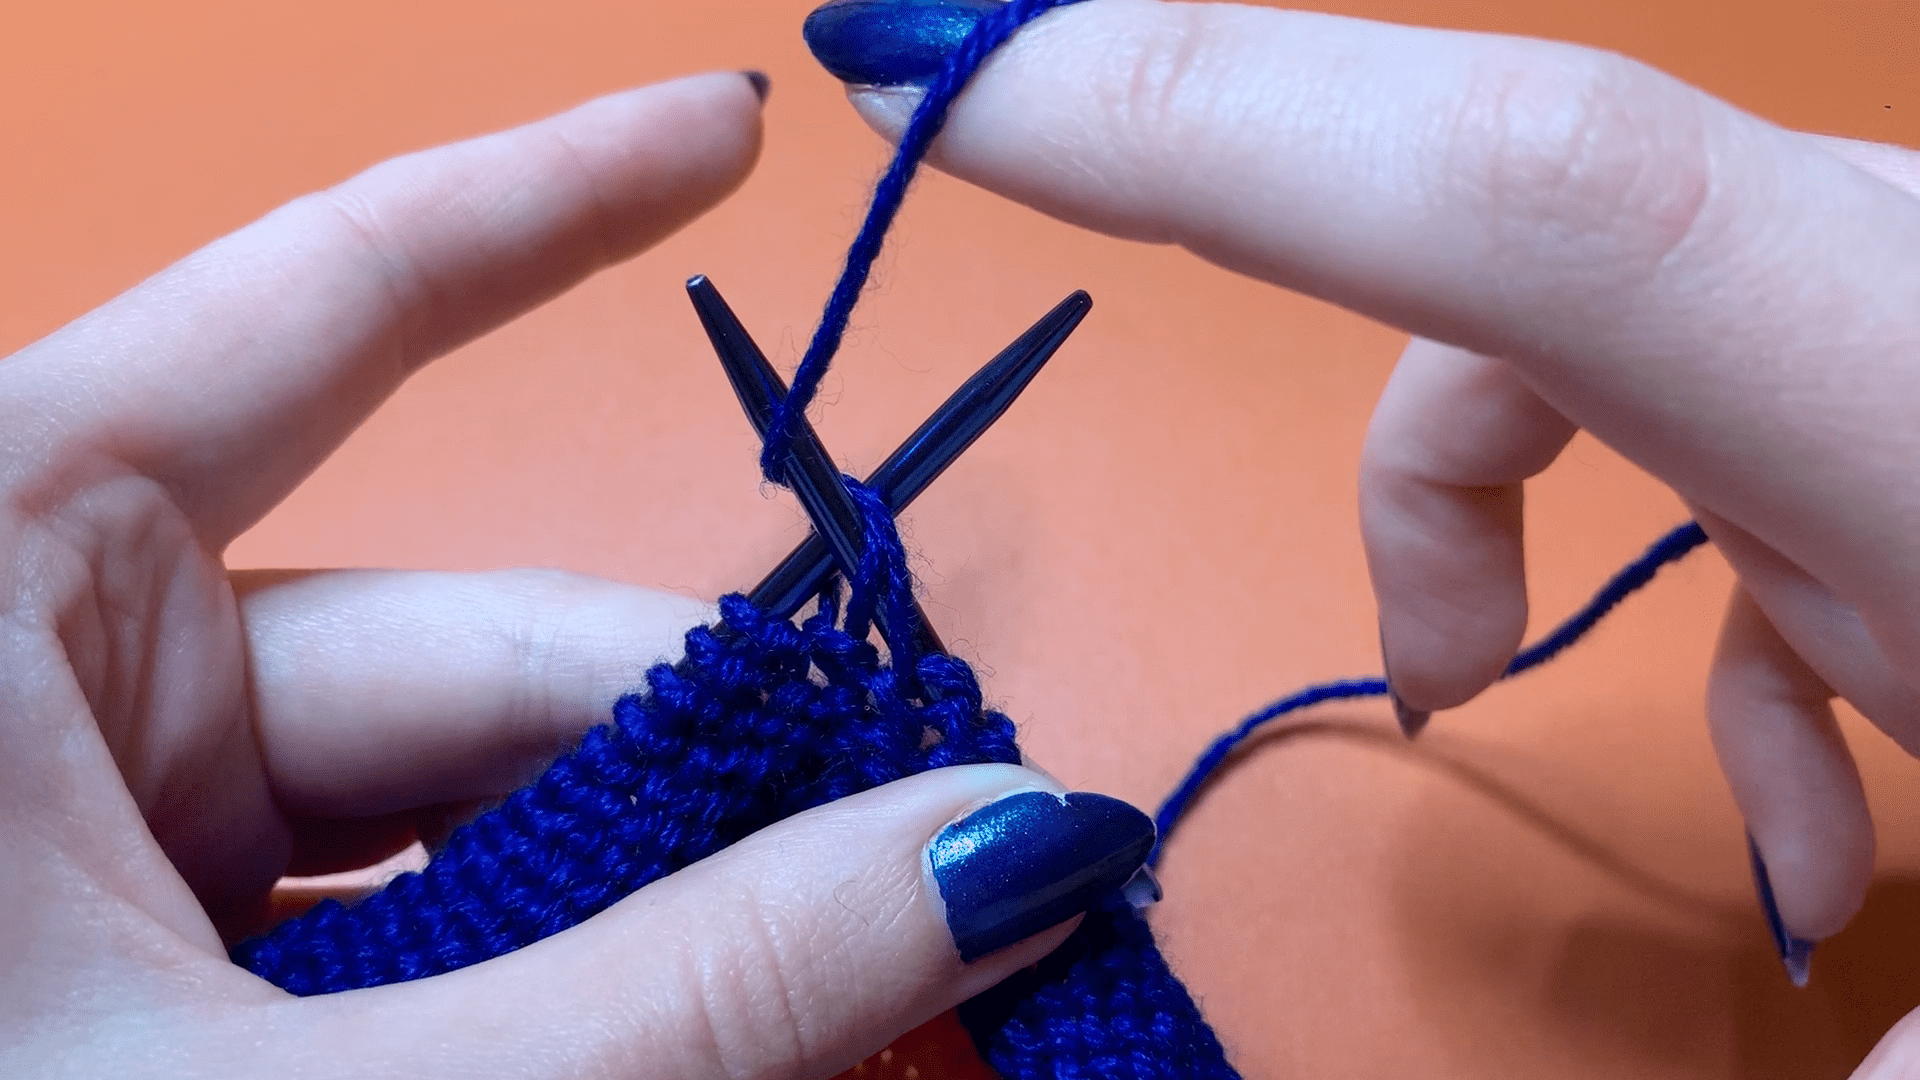
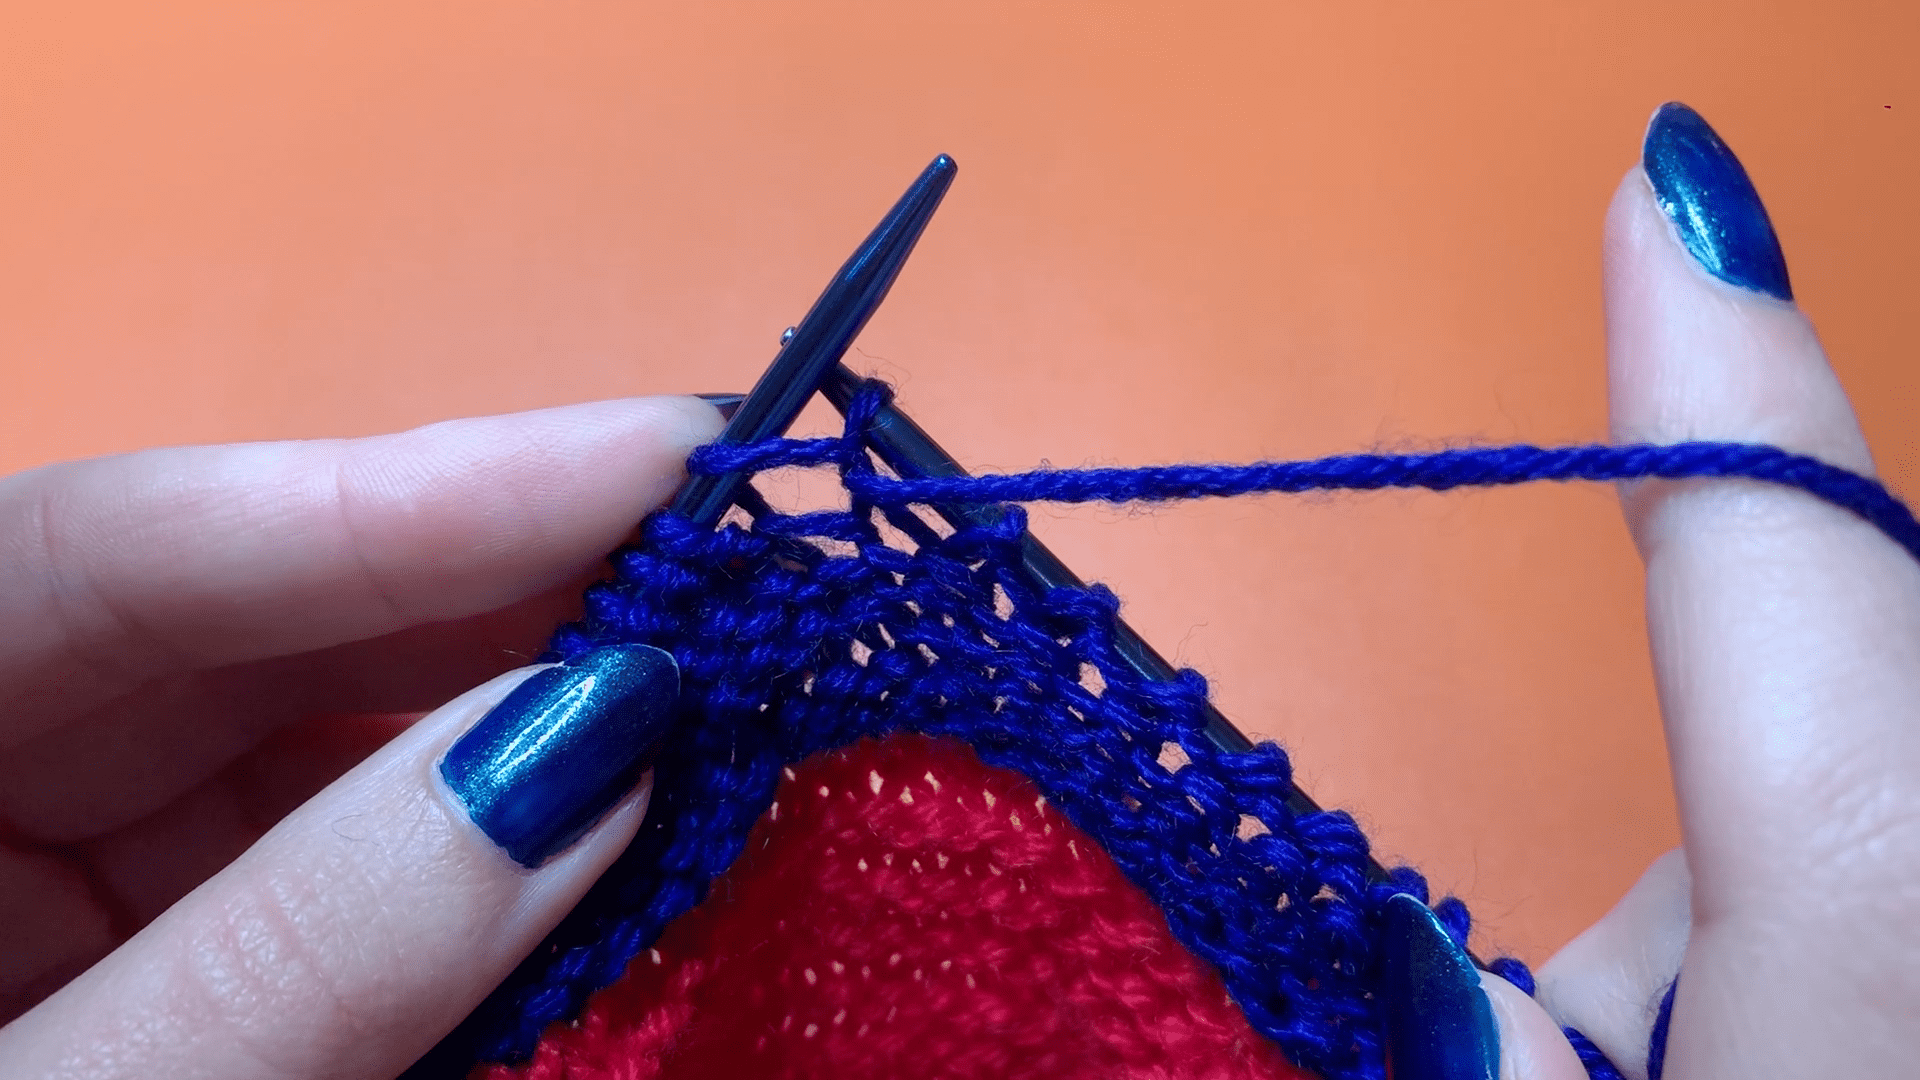
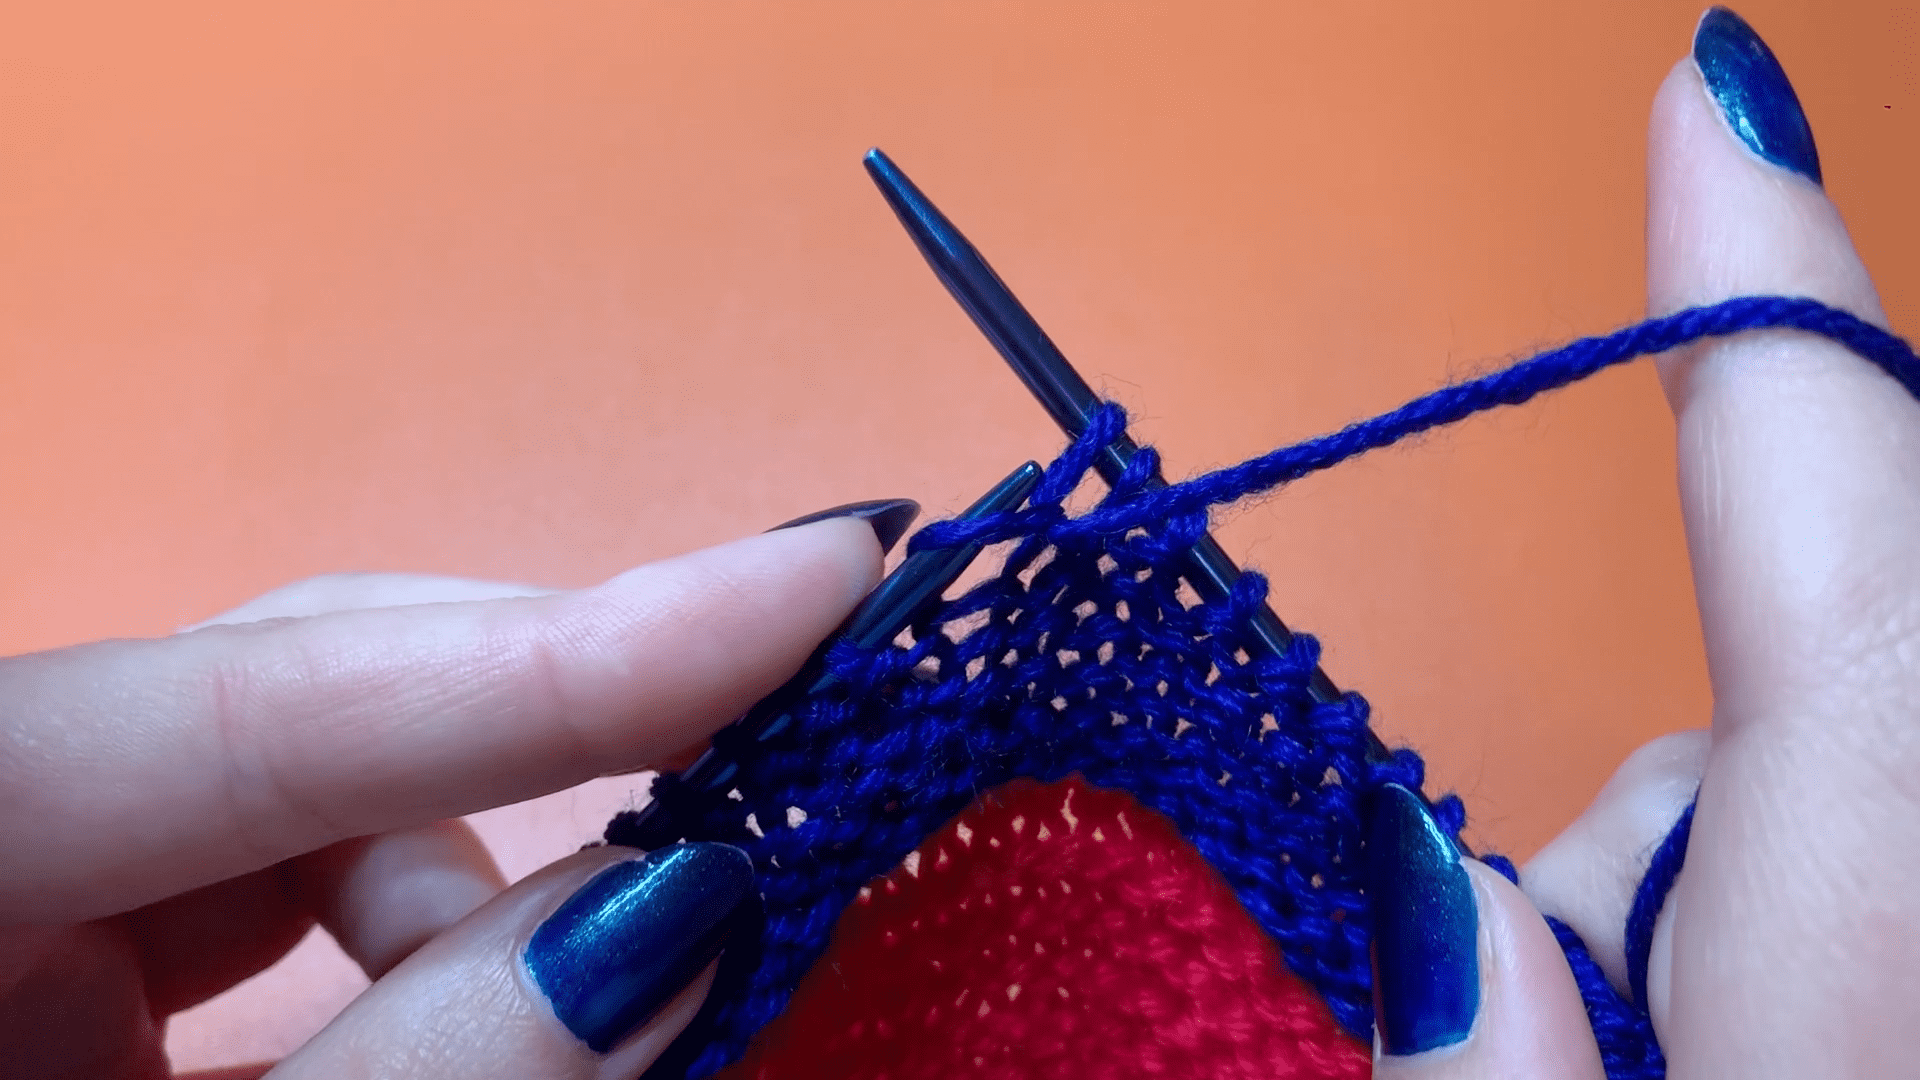
Purling a stitch in the Continental style
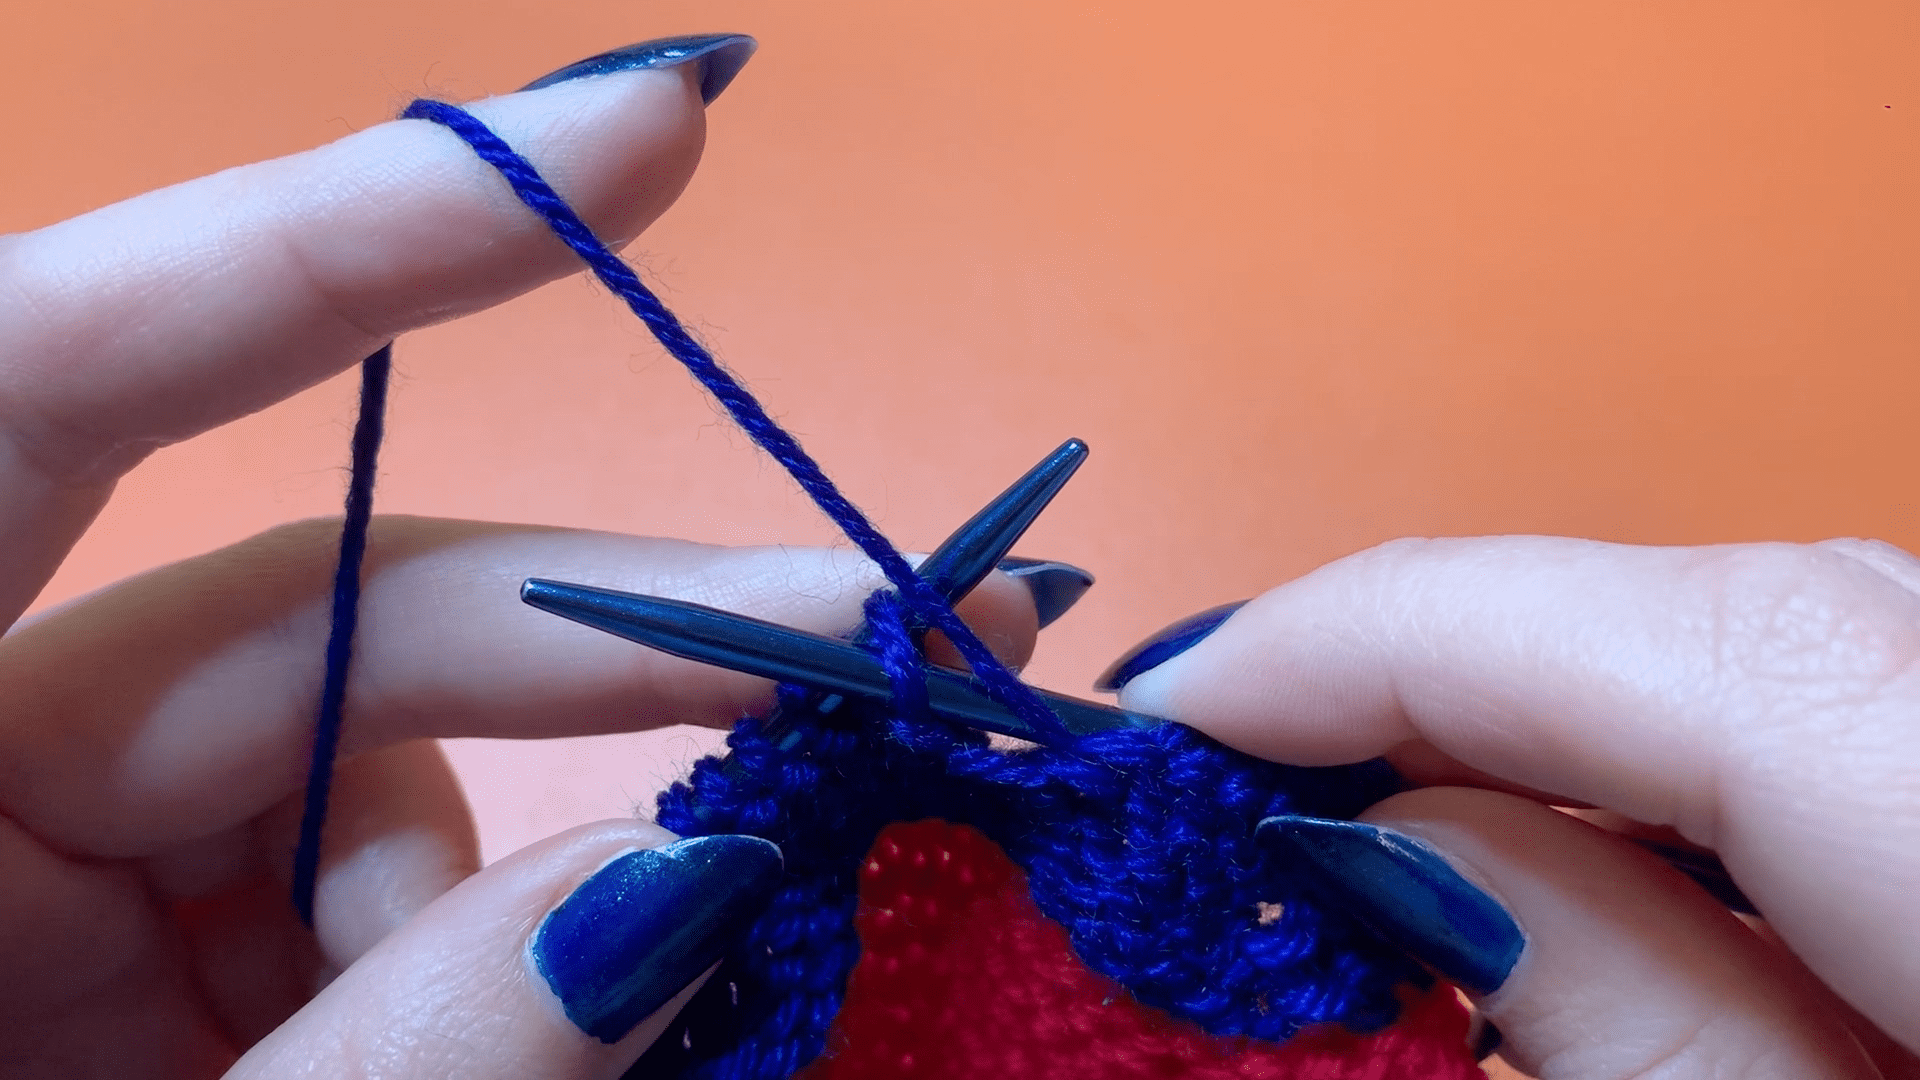
Insert the tip of the right needle into the next stitch, from right to left. The right needle should cross in front of the left needle. The yarn is held in front of the work, looped over the left index finger.
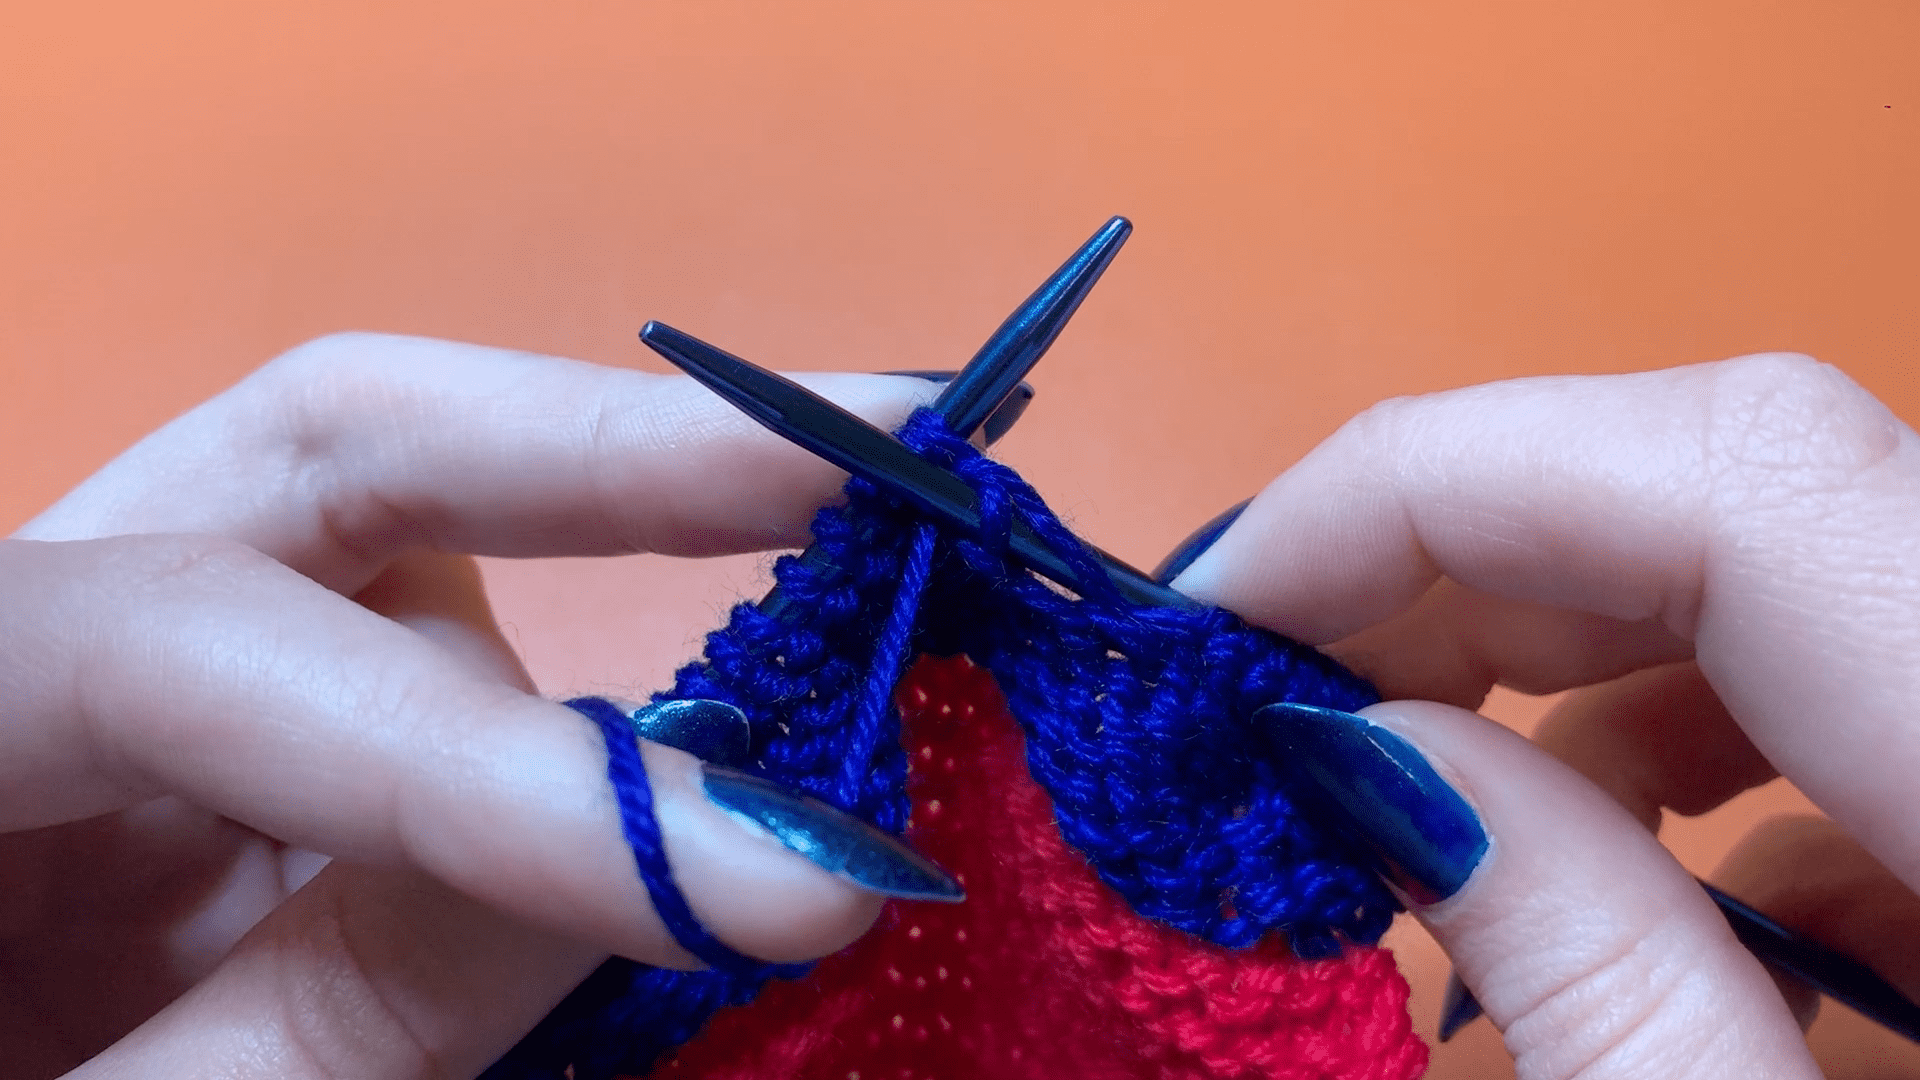
With your left index finger, pull the yarn back and down, so that the yarn wraps around the right needle.
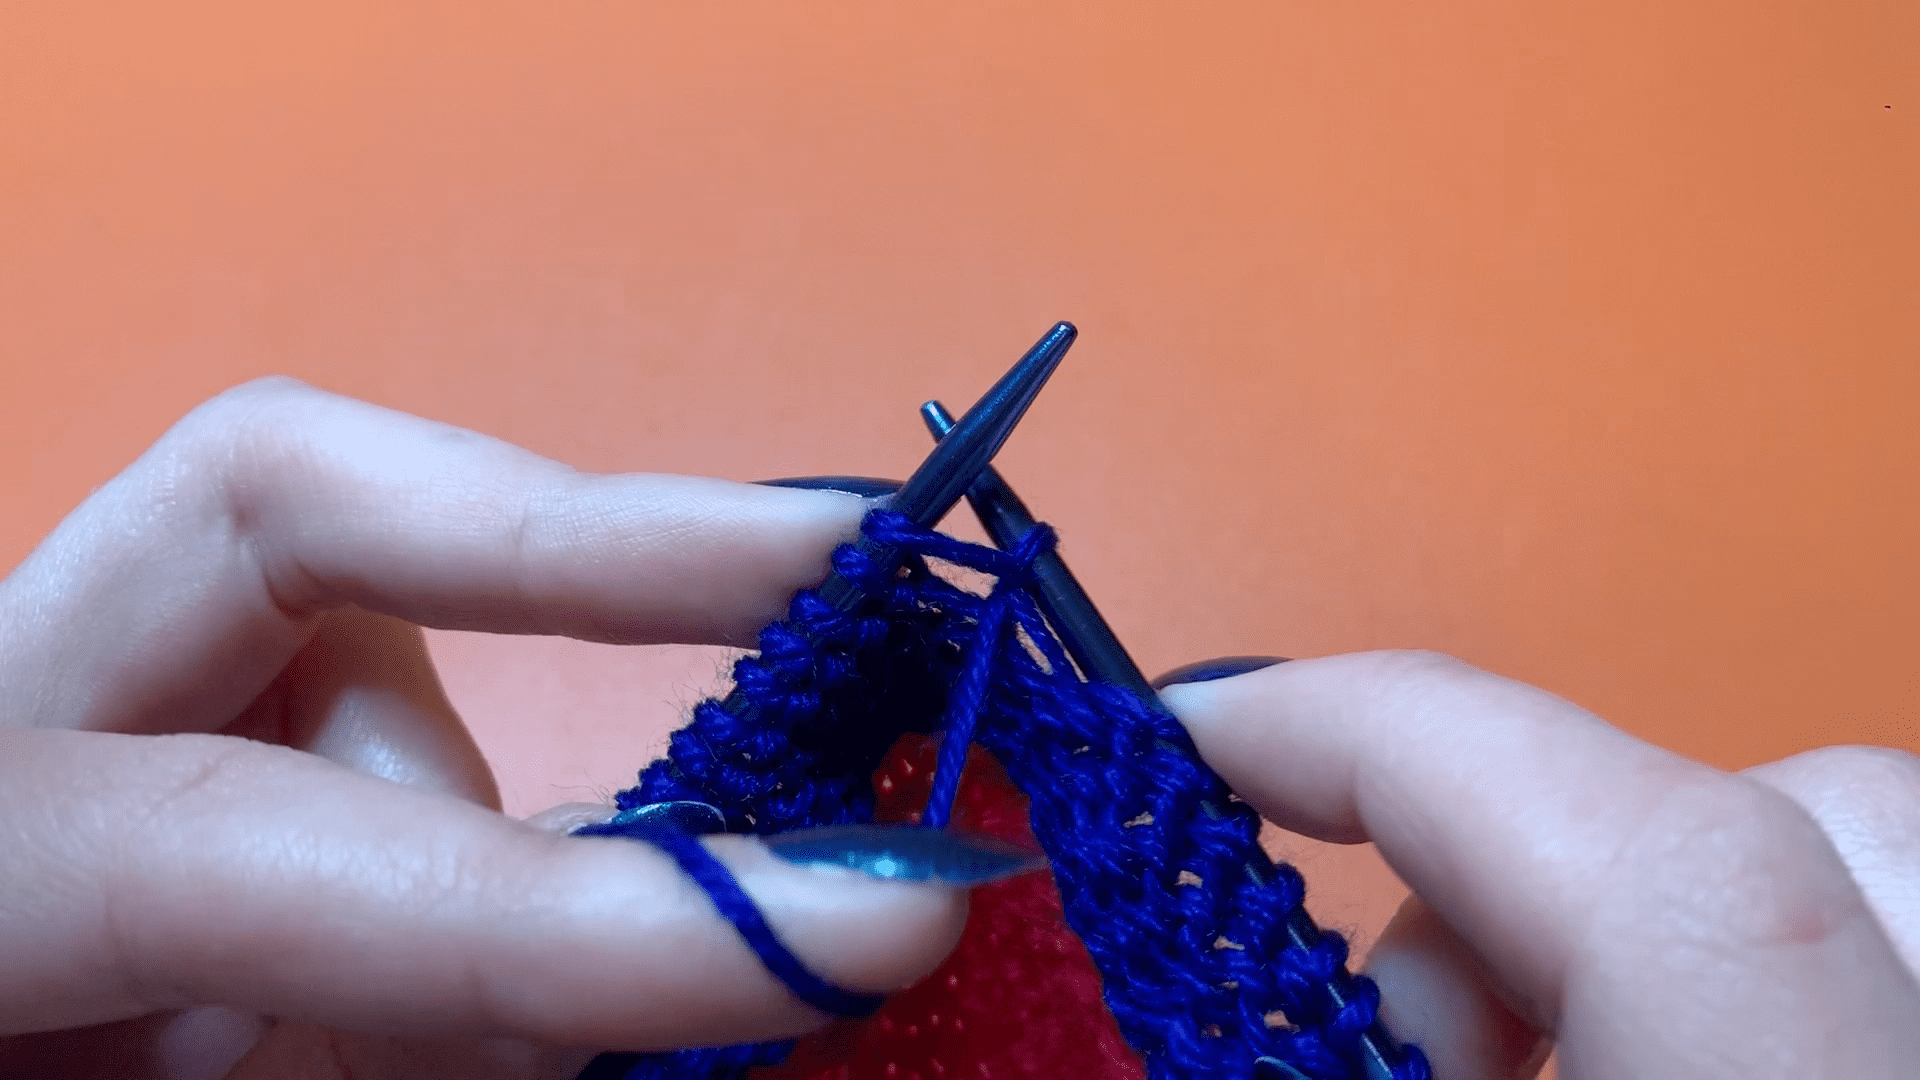
Pull the right needle back through the working stitch, bringing the looped yarn with it.
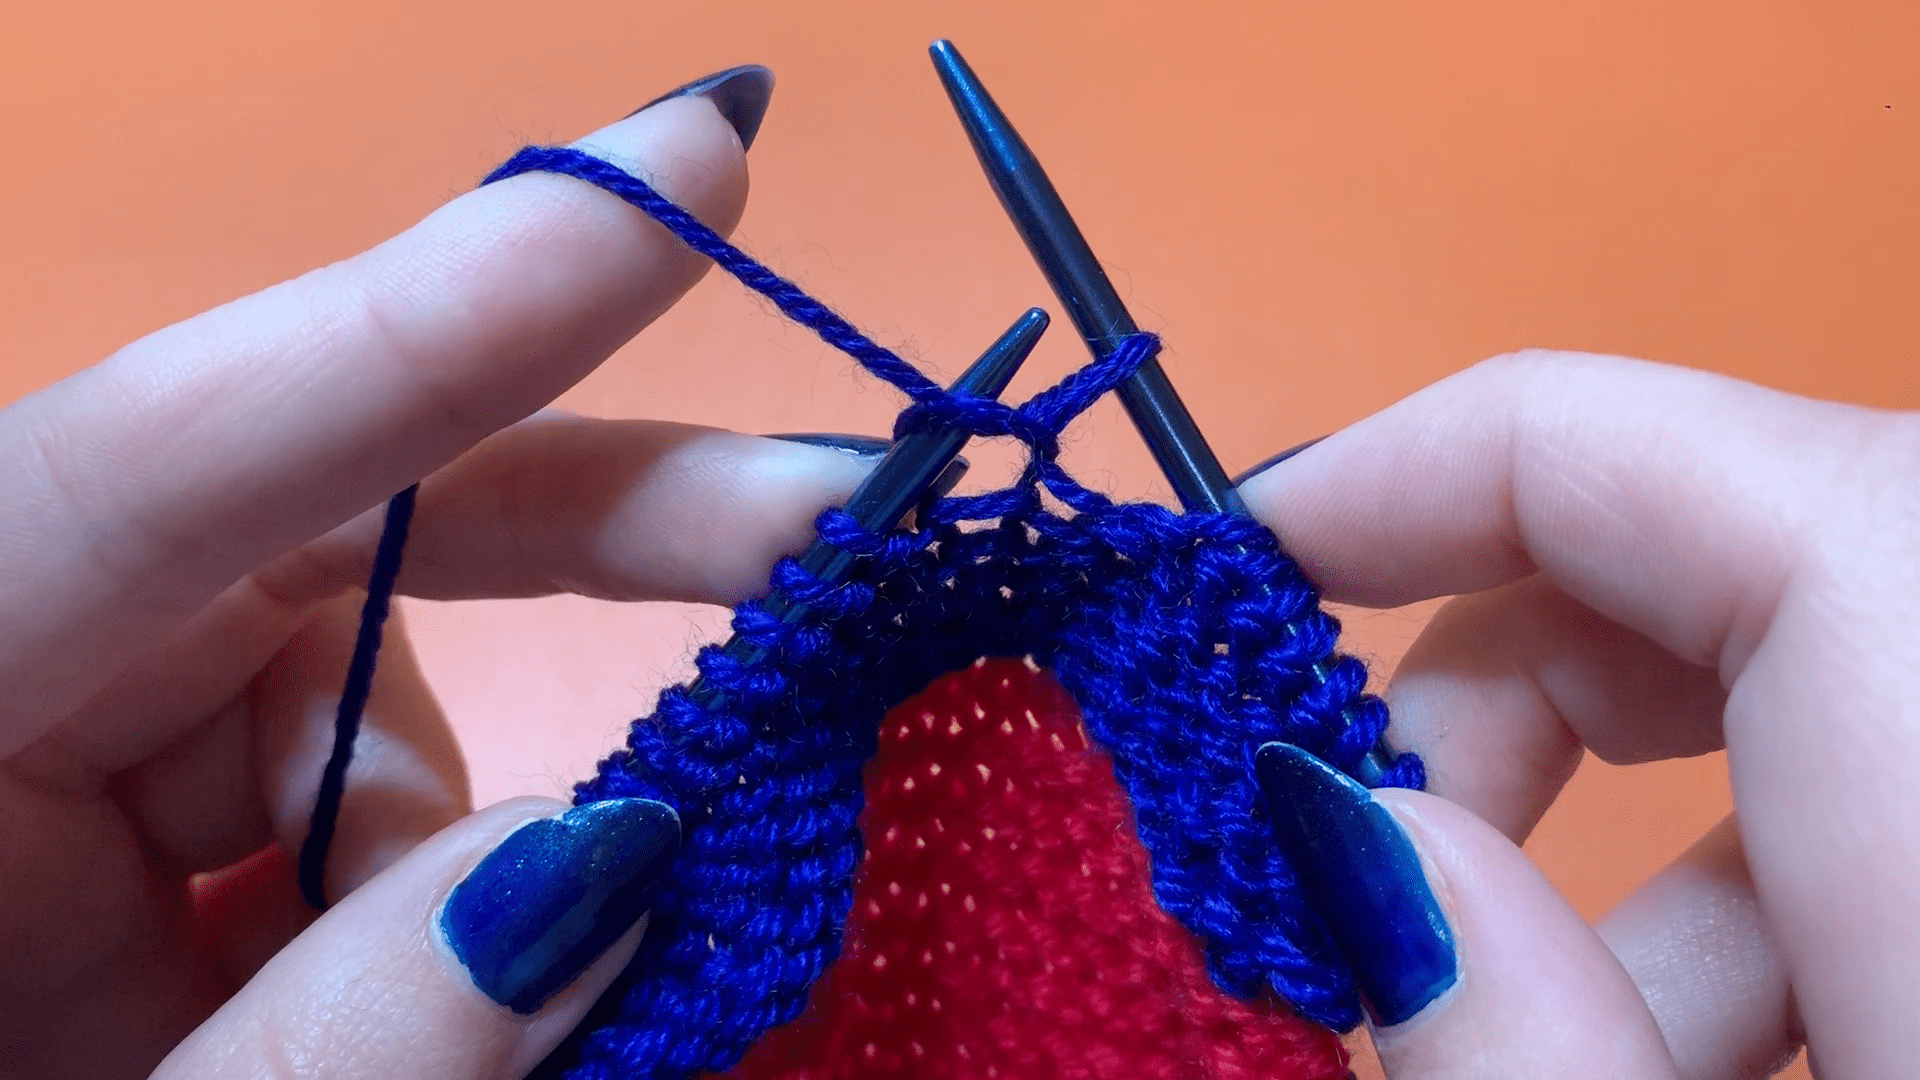
Allow the worked stitch to fall off the tip of the left needle. A new loop now sits on your right needle; this is a new purl stitch!


